Introduction

You may not always need professional services to remove WordPress malware. It's always a huge problem when a WordPress website gets hacked and loaded with a ton of malware and you may not have a budget to pay for WordPress malware removal services. Not only can it affect your SEO, but the malware will also tear your website apart with what looks to be unlimited pop-ups. I've seen times when malware will cause computer viruses to be downloaded to the computer of any visitor that goes to your website. This could be a reason why Google will penalize your website when its crawlers detect malware.

Why does it happen?

Here are a few reasons that can cause WordPress malware within your website.

Web hosting

Your hosting can play a major factor as well. If your hosting provider is not keeping your hosting packages such as PHP up to date, your site will be vulnerable. For this reason, we advise ensuring your web host is keeping your host packages up to date. 

Image Showing WordPress and plugins out of date

Outdated Plugins

WordPress much like many other platforms is prone to hacks but what makes WordPress more vulnerable is the fact that it's extremely popular and plugins are not vetted for security or best practices. 

Outdated WordPress Platform

Plugins and the WordPress development team release updates for a few reasons. They’ll send an update for additional features that have been added, bug fixes to current features, or more importantly security vulnerability fixes. If your WordPress installation is not being constantly updated, every update missed increases your risk of getting hacked.

The Symptoms of malware

You would be surprised that many of the symptoms are not apparent. A lot of the time, you may not even know your site has malware until something breaks. Maybe a page doesn't load properly or has a blank page. You may even start seeing weird PHP errors. If you're running the WooCommerce plugin, you may get complaints from your customers about credit card fraud. 

The more visible symptom is Elements showing on your website that you did not create, or tons of pop ups.

The symptoms all depend on the type of malware and the intentions of the creator which can range from advertising by blasting every page with 100 pop-ups or credit card fraud.

How do I remove wordpress malware?

Before one can fix a malware hack, one has to understand how it works. The fix will not work for everybody but it is definitely worth a try given the circumstances.

Complex Malware

The reason why this may not work for everybody is that some malware has a way of duplicating itself and returning. Essential, the malware developer will create one file. This file we can call the "Master File". This master file is responsible for checking if the malware code snippet is still present in your file system. If you've ever wondered why malware keeps returning, this is why.

How is WordPress malware developed?

The malware developer will cleverly attach this file to either a PHP script that runs on a cron job or a PHP script that is used on typical tasks. For instance, every time a user creates a new post, the PHP script to create a new post would trigger the execution of that "Master File". Finding this master file is extremely tricky, the majority of the time we have to download the full file system to a local WordPress development environment and trace back from the modified WordPress core scripts that have the malware included. 

This method is very time consuming and daunting so if this is the route you need to go, warm up a pot of coffee and get your favorite chair back massager because you will be there for a while.

Tracing down the Malware: The Manual process

There's a little twist to complex malware. A lot of the times, malware is designed to be untraceable. The best way to trace it back to the master file is to search through the file system and seek out the function that is in the malware code. Example: in the image below of a malware code snippet we can see that the "@include" function is used. We also see that whatever is creating this snippet, is commenting the code with "/*075c5*/". These 2 pieces of text are what I would use to search within the file system for the suspect, the "Master File".

Wordpress Malware Code Snippet

Once the master file has been found, you can proceed to remove the code snippets out of the file system without having to worry about them returning.

Simple Malware

We consider simple malware as one that does not have a master file as mentioned above. To fix simple malware it's as easy as removing the snippet similar to the above image. 

WordPress plugin alternatives

To make things that much easier to manage and to add a bit of malware & security prevention. We recommend the plugin Wordfence. Wordfence will not only scan your system for modified WordPress core files but it allows you to scans for malware, and other security issues. You will also have the option to restore the core files and also delete malicious files.

For a full featured list of the Wordfence capabilities you can read more on Wordfence.com

Conclusion

With the increase of WordPress popularity, you can expect an increase in malicious developers creating malware. Keep the plugins in your website to a minimum, use security plugins like Wordfence, and stay on top of your hosting provider about keeping your hosting environment up to date. 


Contact form 7 is a widely used contact form plugin. And why not? It free! More recently we've noticed an issue where Contact form 7 would report "THERE WAS AN ERROR TRYING TO SEND YOUR MESSAGE. PLEASE TRY AGAIN LATER" when a user entered the contact form information and click send. Even though the information is submitted, this error will cause users to try multiple times to submit through the form.

The Fix:

You would be surprised at how easy the fix is. The version of Contact Form 7 we're using is Version 5.1.1. What we've realized is that there was an issue with Google's Recaptcha. Although we already had the Recaptcha API information added, we decided to re-create the Google Recaptcha keys using version 3 of Google's Recaptcha. Once we re-added the keys, voila , a success error message.

Disclamer:

This fix may not work for everybody but as simple as it is, it's worth a try.

We're proud to announce the recent partnership with X-Cart. X-Cart is a pioneer in the E-commerce industry. Their platform exceeds the expectations of stability, speed, efficiency, & ease of use.

X-cart Authorized Reseller

X-Cart Authorized Reseller

What does this mean?

We will be able to offer the ability to start a marketplace similar to Amazon on a very stable platform that has the capabilities to perform well under heavy conditions. We expect to fill the X-Cart marketplace with additional themes and high-quality extensions. Furthermore, we will be able to assist in the setup of the platform from start to finish.

X-Cart for business

For business owners, there's nothing more time consuming and aggravating than an e-commerce website that just won't stay running. X-Cart's long years of efficiency improvements have made them one of the most stable e-commerce platforms in the industry. The platform was founded in 2001, from that time the X-Cart team has worked on increasing the quality of an already high-quality platform.

The underlying framework of X-Cart is also a powerhouse. X-Cart was built on the Symphony framework which is also a pioneer in its own industry.

X-Cart has a conversion beast called X-payments. The X-payments system allows for your customers to save credit cards. For repeat customers, It takes away a few steps from the checkout process resulting in higher conversion rates. X-payments supports major credit card processing platforms to boot.

How often have you tried to find a mobile application for your e-commerce store? X-Cart solves this problem by also offering a mobile application to match your website which is competitively priced.

X-Cart compared

Compared to Magento, the underlying framework is extremely stable. Let's think about this for a second. The Symphony framework went through years of improvements to get to the stable state that they are and so has X-Cart. Magento has re-created their framework so technically, in my opinion, it would take a few years for the new Magento framework to be as stable and efficient as the Symphony framework & X-Cart. With a number of malicious attacks on e-commerce websites, stability is the most important.

[alert type="success"]
Did You know?

X-Cart achievements:

[/alert]

If you're interested in learning more about building a marketplace click here

If you're interested in switching your current e-commerce platform to X-Cart, click here.

If you're like me, you prefer to keep things updated as often as possible. Besides, keeping things updated is a part of preventing security breaches and taking advantage of bug fixes. Unfortunately, this can cause a headache with Magento 2.

The issue

Magento 2 fails to load and reports 1 exception(s):Exception #0 (Exception): Deprecated Functionality: Function mcrypt_module_open() is deprecated.

The Solution

This isn't really a fix but a work around. It appears the mcrypt extension has been deprecated in PHP 7.1. Unfortunately, it appears Magento 2 still utilizes functions derived from the extension. For the time being, you will need to revert to PHP 7.0.

If you would like to see any additional changes, check out the PHP 7.1 change log Here

The fix to this issue is because the form key validation is missing on check out. You can view the fix here How to fix Magento checkout after upgrading

Prerequisites

This is part 1 of a series of steps that I take to speed up Magento. With these steps, I've managed to get a Magento website to load all elements in under 3 seconds. Visually, it appears to be less than 1 second. I've also chopped the loading speed of client websites in half. (Note: I don't use Varnish or any server side caching)With that said, every Magento installation is different therefore not all of these steps will work. Some may not work because of your hosting environment, your theme, the extensions you have installed, or whether modifications made were done within standard Magento practice. During this part of the tutorial series, we will be concentrating on administration settings.

During our optimization, we will be constantly checking our progress using GTmetrix. GTmetrix measures the speed of a website and allows you to see a graphical representation of your progress using a graph.

Let's begin!

The administration panel

There are a few settings we will visit within the administration panel. The first setting will be the Javascript setting, then the CSS setting. After logging into your Magento administration panel, Navigate to System -> Configuration.

1 . Let's start with entering your website URL into GTmetrix. You'll want to see your progress so we need to get a Bench mark.

2. Log into your Magento administration panel and Navigate to System -> Configuration.

Magento 1. x System Menu

Magento 1. x System Menu

Magento 1.x Configuration Menu

Magento 1.x Configuration Menu

3. Next, you will want to navigate all the way to the bottom left and select the Developer menu.

Magento 1.x Developer Menu

Magento 1.x Developer Menu

4. Open the accordion menu item that says "Javascript Settings" and set "Merge JavaScript Files" to Yes then Save Config.

Magento 1.x Set merge Javascript to yes

Magento 1.x Set merge Javascript to yes

4. Test your front end. Many times 3rd party extensions or custom Javascript files will cause your theme to act erratically. Refresh your Magento Cache and Flush Js & CSS cache then browse through the website. My rule of thumb is to check 1 of every page type(Home, Product, Category) and go through a complete registration and checkout.

5. If all is well with your functionality and layout test, Go ahead and retest your website in GTmetrix to visualize your improvement.

6. Let's move on to the CSS Settings located right under the Javascript settings and do the same. Set "Merge CSS Files" to Yes and Save Config.

7. Rince & Repeat step 4. Run through all the tests that I mentioned.

8. Now let's retest your improvements in GTmetrix. If you were able to merge CSS and Javascript without a hitch I'm positive GTmetrix has shown an improvement.

Why did I need to merge Javascript and CSS?

This is an example of a Magento website without Javascript merged. That's over 25 elements that the web server has to load in order to render the website. If this web server isn't on a Solid state drive, the hard drive itself is a bottle neck. If it is, you

Magento 1.x Unmerged javascript

Magento 1.x Unmerged javascript

This is an example of a Magento website with Javascript merged.

Magento 1.x Compressed Javascript file.

Magento 1.x Compressed Javascript file.


Setting flat catalog & flat product

Setting flat catalog product and flat catalog category can be very beneficial. I've seen noticeable speed differences with these 2 options set to "Yes".  The downside to this setting is the extensions that your website has installed. Many extensions that rely on getting data through Magento's model do not accommodate for flat tables, therefore, will display blank information. Let's test it out, it worth a try.

1.While still in system configuration, navigate to Catalog.


Magento catalog setting


2. Select the Frontend accordion menu item to open it. You will see the options "Use Flat Catalog Category" and "Use Flat Catalog Product". Set these options to "Yes" and Save Config.

Magento Enable Flat Catalog Product and Flat Catalog Category

Magento Enable Flat Catalog Product and Flat Catalog Category

3. I can't stress enough how much you should test your Magento website after this setting has been enabled. Test every crack and crevice of Magento. Run through Login, Registration, Checkout, adding to Newsletters, Adding to Compare, Check the page of each product type (Configurable, Simple, Bundled, etc.). If all is well, then you're Golden.

4. You may as well run another GTmetrix test to check your progress. By this time you should see even more of an improvement.


That's a wrap for Part 1... Part 2 will be coming soon.

Prerequisites

Thank you for visiting my blog. First, I'd like to point out that this guide does not apply to cloud hosted websites such as Shopify or big commerce.

What are expires headers

Expires headers tell the browser, which elements of a website to keep in the browser cache and for how long. Every time a website loads, it has to load all the elements that build or renders that web page from the server. With modern web development and design, these can be many elements and many of them can be large in size. With expires headers enabled, when a website is loaded in the browser, it pulls those elements from local browser storage instead of the server enabling that web page to load faster.

How it works

How it works is very straight forward. You specify the element, whether it's a jpg element or a CSS element. You then specify how long the browser should keep that element in the browser cache.

[alert type=''info"]Note: If you're designing a website with Expires headers enabled, use incognito or use a plugin to refresh your cache. You may see false positives in your design. [/alert]

Script Example

Here's a sample script that you can use. When implementing this script, you will want to use a service like GTMetrix to test the results. What I will typically do is play with the cache lifetime for each "ExpiresByType" to see what works best.

[code]

<IfModule mod_expires.c>

############################################
## Add default Expires header
## http://developer.yahoo.com/performance/rules.html#expires

ExpiresActive On
ExpiresDefault "access 1 month"
ExpiresByType image/x-icon "access 1 month"
ExpiresByType text/html "access plus 1 seconds"
ExpiresByType image/jpg "access 1 month"
ExpiresByType image/jpeg "access 1 month"
ExpiresByType image/gif "access 1 month"
ExpiresByType image/png "access 1 month"
ExpiresByType application/x-shockwave-flash "access 1 month"
ExpiresByType text/css "access plus 604800 seconds"
ExpiresByType text/javascript "access 1 month"
ExpiresByType application/javascript "access 1 month"
ExpiresByType application/x-javascript "access 1 month"
ExpiresByType application/xhtml+xml "access 1 month"

</IfModule>

[/code]

I hope this helps someone. Thanks for reading.

After you've upgraded to Magento version 1.9.3.4 have you noticed that your check out just sits on billing information and doesn't proceed to the shipping options? Apparently, the Magento team discovered a security issue and added form key validation on check out.

What are form keys?

Form keys help prevent Cross Site Request Forgery attacks on Magento forms. Cross Site Request Forgery is the attempt of submitting malicious form information from one website to another. (In lamen's terms) Form keys are a way for a website to validate that the form submission is being sent within itself. In the Magento world, in order to create any custom forms, they must have a form key. If not, the Magento action controller will not respond.

How do I fix it?

Well, there are 3 options to resolve this issue.

  1. Remove app/design/frontend/(Your custom package)/(Your custom theme)/template/persistent & app/design/frontend/(Your custom package)/(Your custom theme)/template/checkout
  2. If your check out was heavily modified, you can add the form key validation to your theme. Right before the ending form tag of the billing form and the payment form, place the code [code]<?php echo $this->getBlockHtml('formkey') ?>[/code]
  3. Disable form key checks on checkout. [alert type="danger"]I Highly do not recommend this option[/alert]

It's understandable that this will result in lost revenue. If you have to keep your online store running and cannot wait for a web developer to resolve the issue. Navigate to System -> Configuration. On the left column, scroll all the way down to Advanced -> Admin. In the collapse, select security and set "Enable Form Key Validation On Checkout" to No.

Broken checkout after Magento upgrade

Broken checkout after Magento upgrade

That should solve your issue. Please do leave a comment if you have any questions. Thanks

Utilizing expires headers is an important part of optimizing your website. At times it can be tricky. Apache2 configuration syntax is extremely particular. I've gathered a few items to check when you've experienced this issue.

1. Server logs

When troubleshooting anything with Apache 2, your first step should be checking the apache error log. The Apache logs will let you know everything that is going on with your web server.

The location is

/var/log/apache2/

2. Verify your modules are available

Within your default configuration file [code]/etc/apache2/sites-available[/code] or your .htaccess files. There may be references to an Apache module that does not exist.

[alert type="info"]

Example:

You may be familiar with this code in .htaccess [code]<IfModule mod_rewrite.c>[/code]. This is a if statement that will ignore any trailing directives before the closing tag. This will prevent Apache from crashing if the module is not present. Many will add a .htaccess directive without the if statement resulting in a crash if the module isn't there.

[/alert]

3. Verify your Apache config files are correct

Apache has a few files you should be checking.

apache2.conf which is located at [code]/etc/apache2[/code]

envvars configuration file which is located in the same place

Your configuration files located in [code]/etc/apache2/sites-available[/code]

[alert type=" info"] If you're not sure which one is available, you can run [code]apachectl -S[/code] on the command line[/alert]

That's about all I can think of when I troubleshoot Apache issues. Keep in mind, when troubleshooting Apache 2, your error logs are your best friend. If I'm missing something please let me know.

Quick Introduction

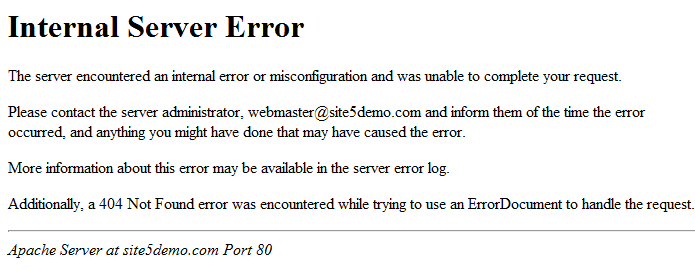
Recently I was optimizing a client website on a development server. Typically when optimizing I'll start with going through .htaccess and ensuring that it’s set up for the best web performance. I will typically spend the most time with Expires headers. Every website will respond to expires headers differently which is the reason why it takes up most of my time during .htaccess optimization. Either way, I updated expires header on the website and boom, 500 Internal server error.

The Cause of the error

Apache reports an internal server for many reasons. Syntax within in .htaccess is included in this list. After verifying that your expires syntax is correct there's one hidden syntax issue you may not have corrected. Many times when copying and pasting a piece code into .htaccess, you also copy hidden characters or blank spaces. Apache absolutely hates this. The blank spaces will typically be at the end of every line in the code you've added.

So what's the fix?

The fix is simple.

Within the htaccess file, place your cursor at the beginning of the last line in the code added.

Press delete. What should happen is your line is now at the end of the line above. If it's not, continue until it is.

Press Enter to place the line back into its original position.


I hope this helps!


Copyright © Mage H.D. Inc.
envelopephonemap-marker linkedin facebook pinterest youtube rss twitter instagram facebook-blank rss-blank linkedin-blank pinterest youtube twitter instagram